An invoice is a commercial document that itemizes a transaction between two businesses. If you are a freelance worker or small business owner, chances are you will need to create and send invoices to your clients in order to get paid. While there are many online tools and software programs that can help you make an invoice, it is also possible to make your own using Microsoft Excel or another spreadsheet program. In this blog post, we will walk you through the process of creating your own invoice step-by-step. We will also provide a template that you can use for your own business transactions.
How to create an invoice: A step-by-step guide
Assuming you’ve already decided on the billing method you’ll be using for your business, it’s now time to generate your first invoice. If you’re not sure how to create an invoice, don’t worry—we’ll walk you through the process step by step.
To get started, gather the following information:
-Your business name, address, and contact information
-Your customer’s name and contact information
-A description of the goods or services you provided
-The date of service or delivery
-The amount owed for the goods or services you provided
-Any discounts or promotions applied
-Your preferred method of payment

Once you have all of this information, you’re ready to start creating your invoice. Here’s a step-by-step guide:
1. Start with your business name and logo at the top of the page. Include your address and contact information below.
2. On the next line, include the date and a reference number (e.g., Invoice #123). This will help you keep track of payments and correspondence later on.
3. Below that, add your customer’s name and address. If they’re a new customer, be sure to include any relevant account information so they can easily make a payment.
4. Now it’s time to list out the goods or services you provided, including a brief description, date of service/delivery, and cost. If you offer discounts or promotions
How do I make an invoice online for free?
If you need to create an invoice but don’t have a lot of money to spend on software, there are some free online tools that can help.
One popular option is Google Sheets, which is part of the Google Drive suite of productivity tools. Google Sheets has a built-in template for creating invoices, which you can customize to fit your needs.
Another option is Bullvoice, which offers a free plan for creating and sending invoices. Bullvoice also has paid plans that you can use, or you can start from scratch and create your own custom invoice.
Once you’ve created your invoice, you’ll need to fill in the relevant information, such as the customer’s name and address, the items or services being billed, and the amount due. Once you’ve entered all the necessary information, you can then save and download the invoice as a PDF file.
How Do I Create an Invoice in Microsoft Word?
There are a few things you’ll need to include on your invoice in order to make it complete and professional looking. At the top, be sure to put your business name and contact information including your address, phone number, and email. You’ll also want to include the date the invoice is being issued, and a unique invoice number. In the main body of the invoice, list out each item or service being billed along with the corresponding cost. Include any relevant details such as quantities, sizes, or dates next to each line item. Finally, below all of the items being billed, calculate and include the total amount due and specify the terms of payment (e.g. “Net 30”). Be sure to sign and date the bottom of the invoice before sending it off.
How do I create an invoice in Excel?
Assuming you have a basic understanding of Excel, creating an invoice in Excel is relatively simple. First, open a new workbook and save it as a .xls or .xlsx file. Then, create the following columns:
-Invoice Number
-Date
-Customer Name
-Address
-Description
-Quantity
-Price
-Amount
In the first row of each column, enter the appropriate header information. Then, begin entering your invoicing data in the rows below. When you’re finished, be sure to save your workbook.
Invoicing software gives you further customization options
When you create an invoice with QuickBooks Online, you have the option to add your company logo and custom colors to make it look more professional. Plus, you can save your invoices as templates so that you don’t have to start from scratch each time.
What’s the Proper Invoice Format?
There are a few key elements that should be included on every invoice, no matter the format. At a minimum, your invoice should include:
1. Your company name and contact information – Include your company name, address, phone number, and email address so your customer can easily get in touch with you if they have any questions about the invoice.
2. The customer’s name and contact information – Make sure to include the customer’s name and billing address so you can properly credit their account.
3. A unique invoice number – Assign each invoice a unique number for easy reference and tracking.
4. The date of the invoice – Be sure to include the date of the invoice so your customer knows when payment is due.
5. A brief description of the products or services rendered – Include a brief description of what was provided so there is no confusion about what was invoiced.
6. The total amount due – Make sure to clearly list the total amount due so your customer knows how much they need to pay.
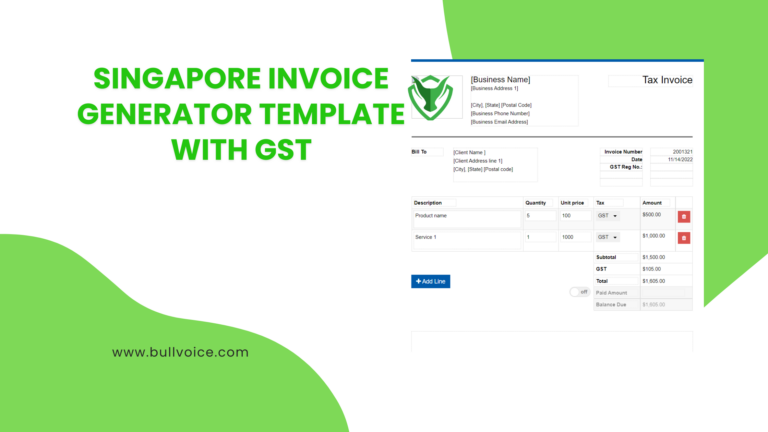
7. Payment terms – Include your preferred payment method (e.g., check, cash, credit card) and any relevant details (e.g., account number) as well as when payment is due (e.g., net 30).
Bullvoice Invoice Software simplifies all the above tasks in easy steps. Just Signup on the software according to your business type. Watch demo videos and Start Creating Invoices Now. Create beautiful invoicing within a click! …. Welcome to the original Bullvoice Invoice Generator Software, trusted by millions of people.
 Start free


